Using TinyUSB, MCX A and WebUSB to Create a BLDC Motor Controller Test Tool
July 8, 2024
Jerry Palacios
Eli Hughes
Introduction
The MCX A is one of latest members of the MCX all-purpose microcontroller device series. All MCX A devices include a Full-Speed USB device (USBFS) controller with onboard PHY. The combination of small / low pin count device packages such as a 5mm2 32QFN with the full speed USB positions MCX A for interesting USB peripheral applications.
In additional the complimentary NXP USB stack built into the MCUXPresso SDK, the MCX A also works with the popular open source TinyUSB Stack. TinyUSB is a small and highly agile USB stack supported by Adafruit and provides an alternative method of implementing USB features on MCX A. The examples on the TinyUSB GitHub repository are built at the command line with make or CMake.
However, TinyUSB is simple to integrate with an MCUXPresso project and the MCXA153 SDK. In this paper, we will show how to setup TinyUSB with MCUXpresso IDE and demonstrate using the FRDM-MCXA153 to create hall effect sensor simulator for BLDC motor controller testing.
Application Example : A BLDC Hall Effect Sensor Simulator Using a WebUSB GUI
During the development of a BLDC motor controller, we needed a method to simulate the output signals of the hall effect sensor. The general concept was to construct a test tool that generates 3-phase hall effect signals programmatically so we could test the motor control BLDC logic. We used the FRDM-MCXA153 to prototype the concept.
TinyUSB has many interesting device class samples, and it is straightforward to integrate into a MCUXpresso project. This sample implements a composite device custom vendor class interface and a CDC (serial port) interface. We will show how to send data to the MCXA153 custom vendor class interface via the WebUSB API.
WebUSB (and WebSerial) is a browser API that enables interaction with USB devices from within a HTML / JavaScript page with Google Chrome or Microsoft Edge. The WebUSB API can communicate with raw endpoints in a custom vendor device without the need for a special driver. WebSerial is an API that allows interaction with standard serial ports.
This enables custom USB hardware GUIs without special driver or software installation. It is also possible to use Android tablets and smart phones. You can find a sample MCUXpresso project here:
The docs folder inside of the example repository has a simple HTML/JavaScript example which is hosted on GitHub pages. You can browse to https://wavenumber-eng.github.io/bldc/ using Chrome or Microsoft Edge.
The web interface has a slider which sets the commutation / step rate of the simulated hall effect sensor in real-time. The FRDM-MCXA153 outputs the signals on GPIO ports 1-10, 1-12 and 1-13. Because we used both USB-CDC and a vendor class device, we can control via our Web GUI , simple serial terminal such as putty or any other OS GUI framework that supports serial ports. The WebUSB interface provides an interesting use case for demonstration.
An interesting aspect of a WebUSB device is that you can implement a special descriptor that will trigger a notification of where to load the web page.
TinyUSB / MCUXpresso Integration
TinyUSB offers a simple getting started guide for configuring it will any build system.
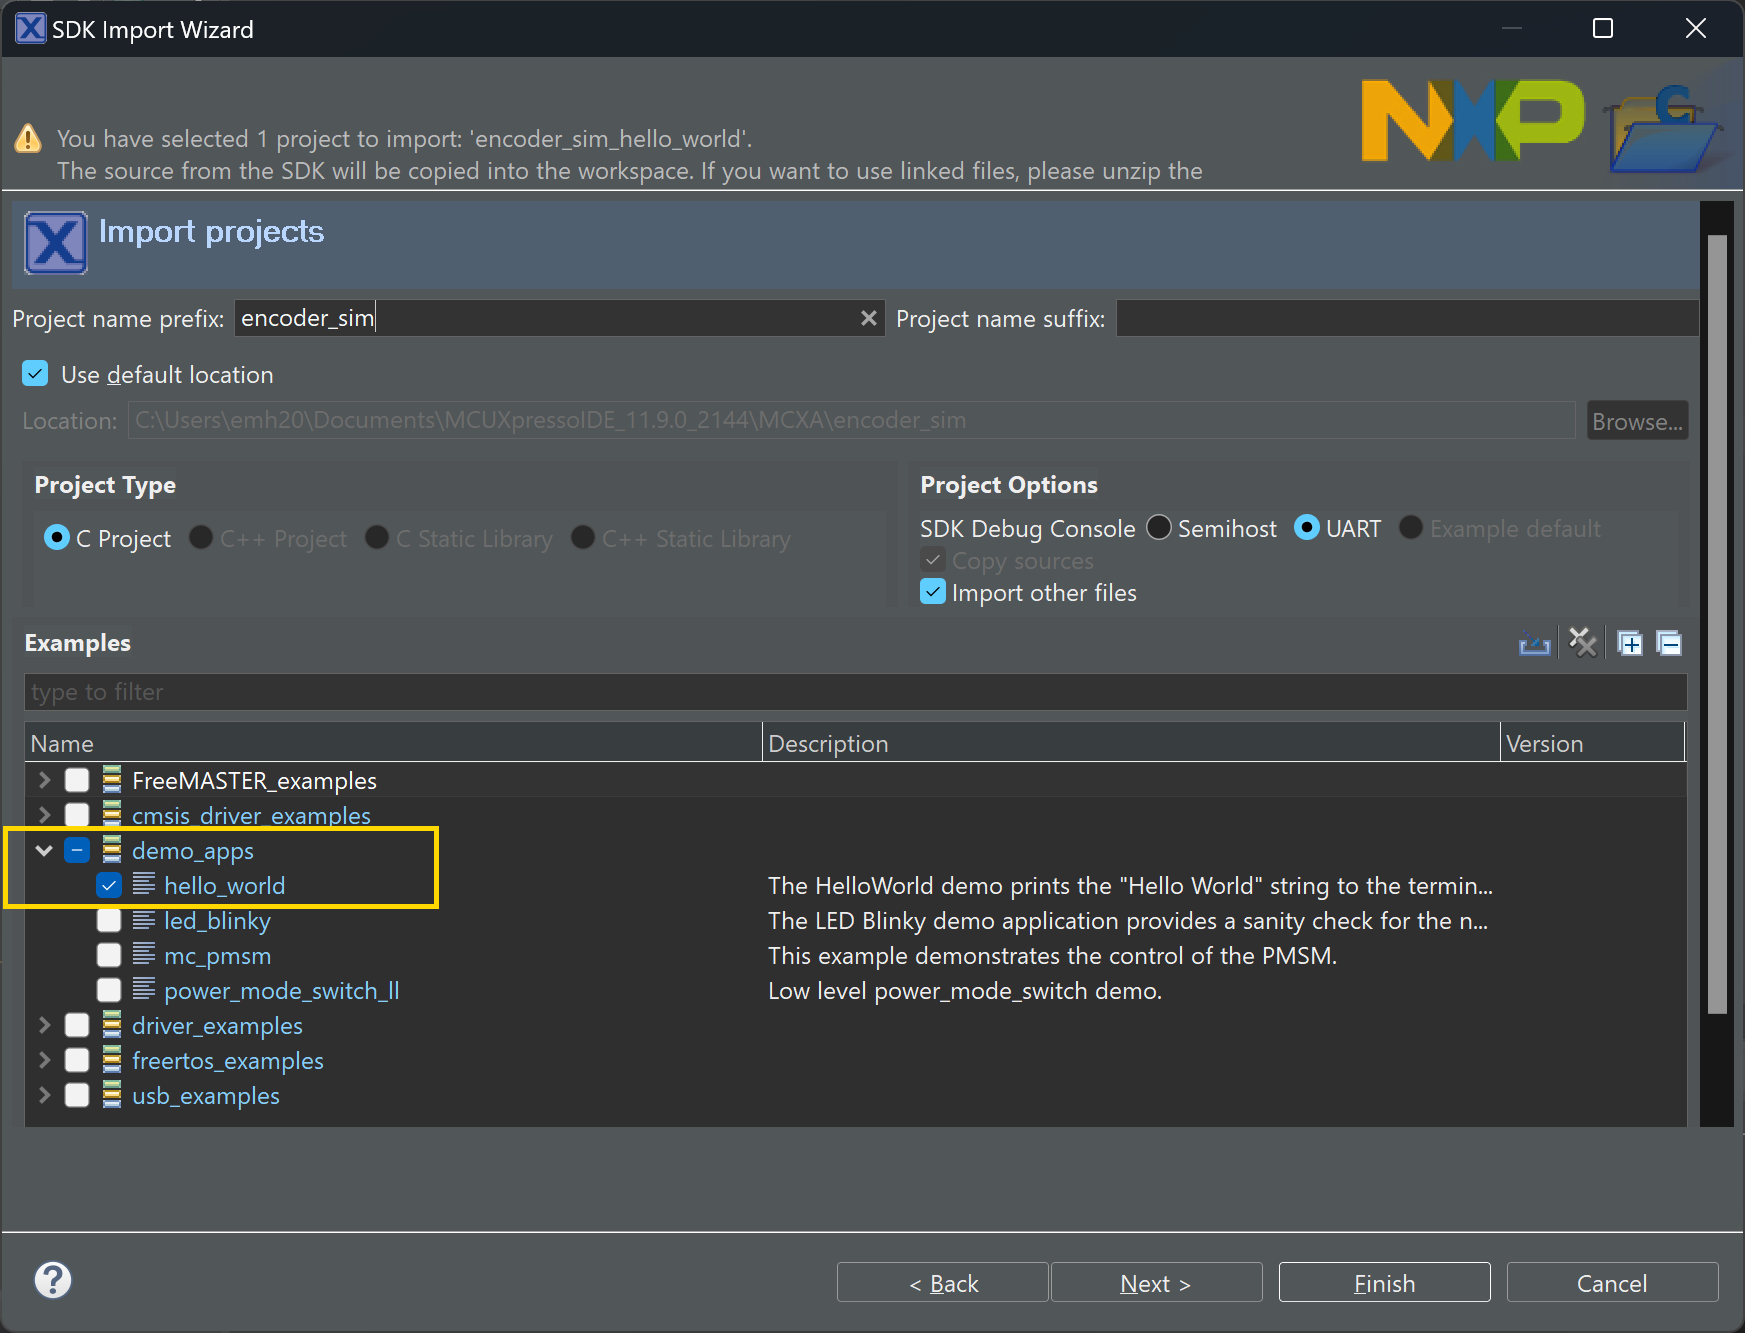
Step 1 : Create a new MCUXpresso Project
Create a new MCUXpresso project for the MCXA153. You can start with the “hello_world” application as a template. We called this project “encoder_sim.”
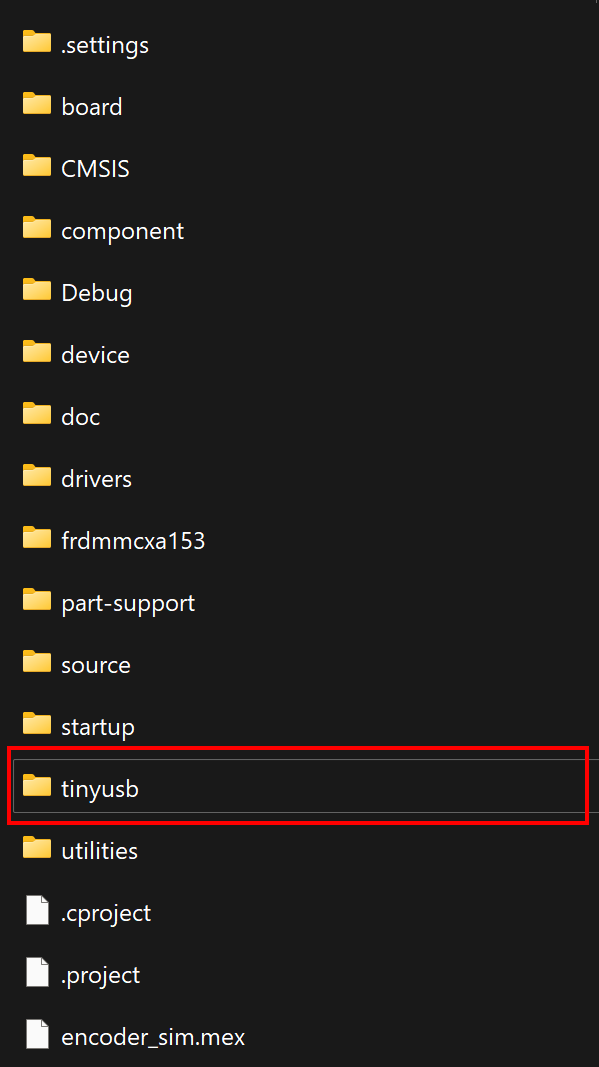
Step 2 : Add TinyUSB Source files to you project filesystem
Clone the TinyUSB repository and place inside of the folder that contains your MCUXPresso project.
Note: If you place your main application in a git repository, you can alsogit submodule the TinyUSB repo so you can either stay with most recent version or lock to specific commit.
It is also ok to just download a static copy of the files and place them into the project file system. It is not necessary to directly place the TinyUSB folder inside of the MCUXpresso application folder. We could have chosen a folder outside of the main project source tree, but this example assumes that TinyUSB is in the same folder as the MCUXpresso application.
Step 3 : Configure the MCUXpresso to add TinyUSB to the build
MCUXpresso will detect the additional TinyUSB folder, but we need to tell it to build a specific set of files in the TinyUSB folder. Here is how to configure Eclipse/MCUXpresso to build the files in tinyusb/src folder
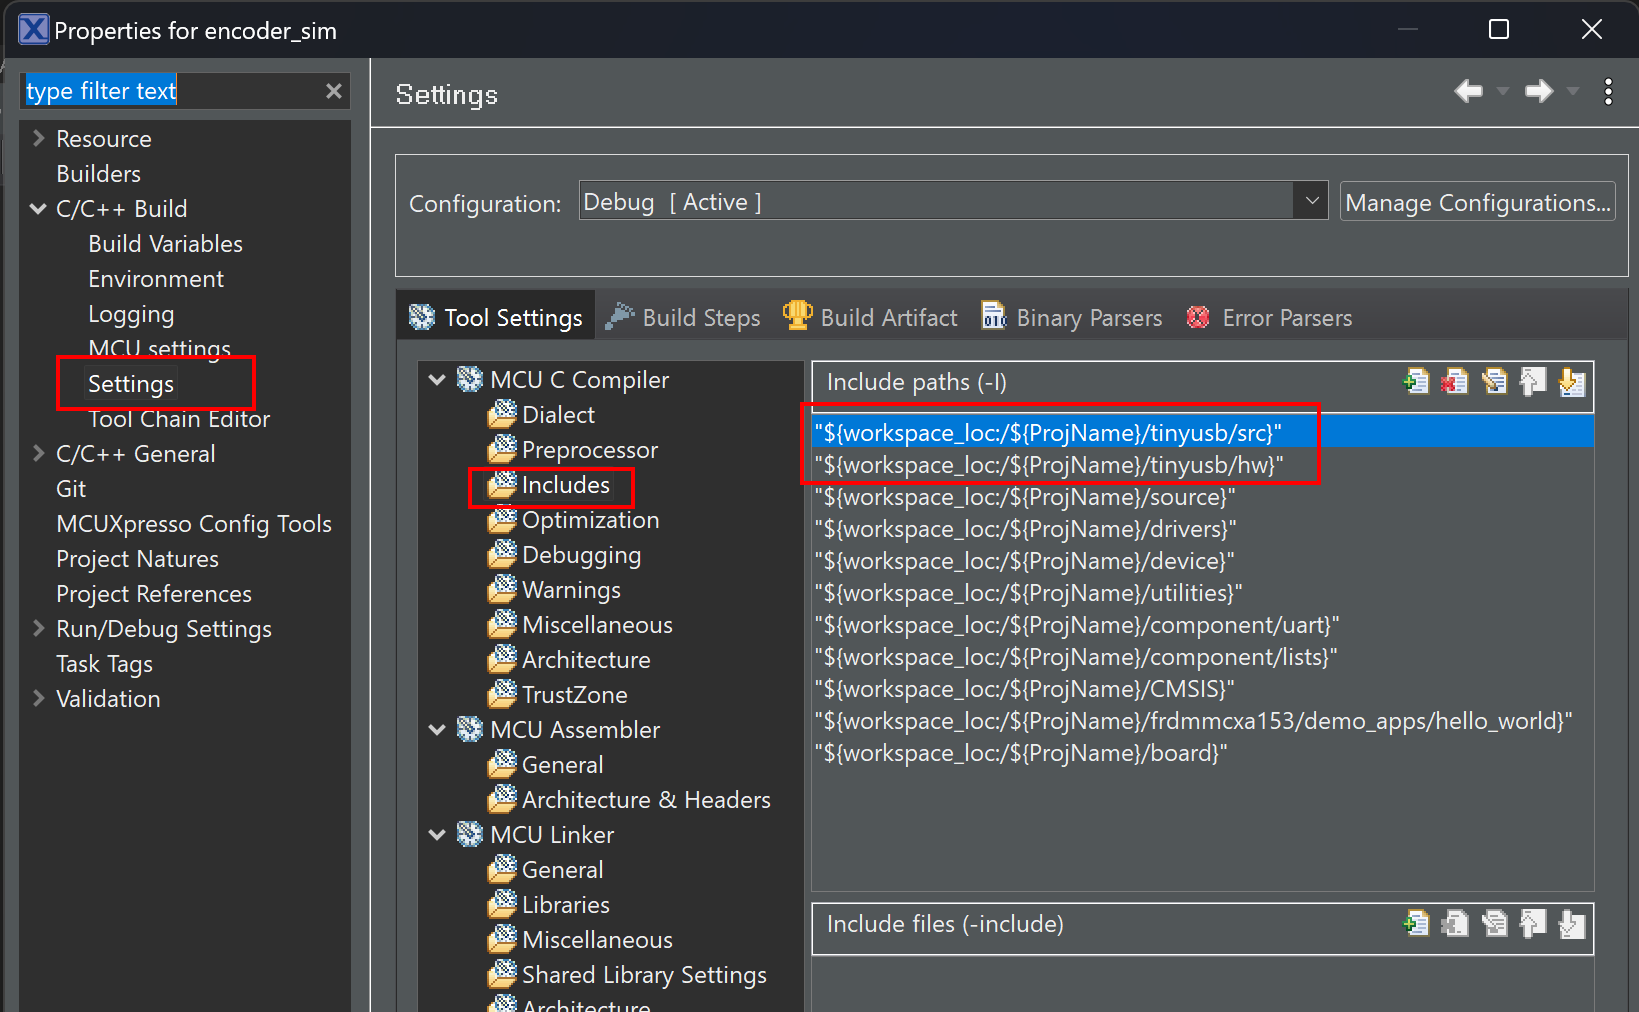
Step 4 : Update Include Paths
Add the tinyusb/src and tinyusb/hw folders to your project’s include path so our application can find all the of the core TinyUSB header files.
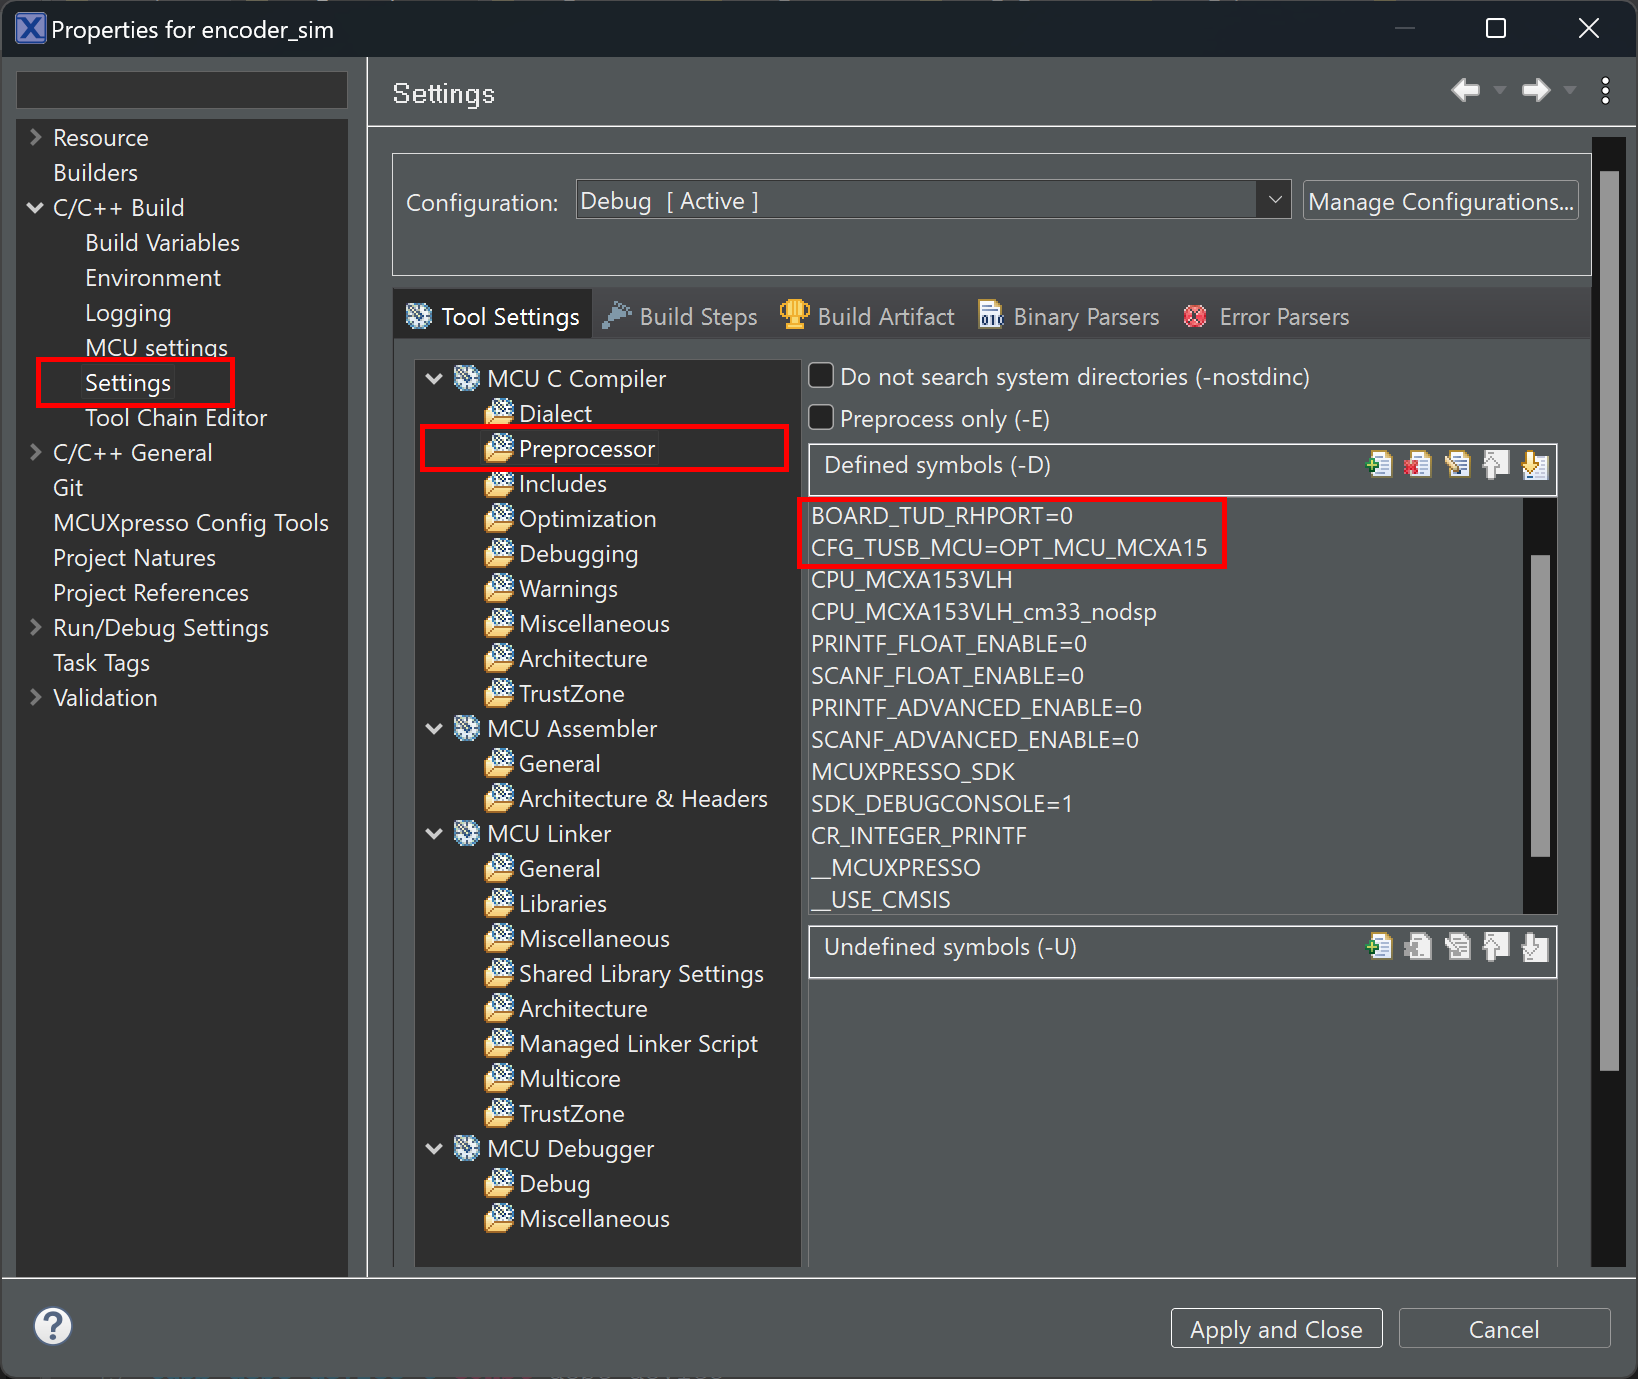
Step 5 : Add Build Configuration Symbols
We need two build symbols added to the project:
BOARD_TUD_RHPORT=0
CFG_TUSB_MCU=OPT_MCX_MCXA15
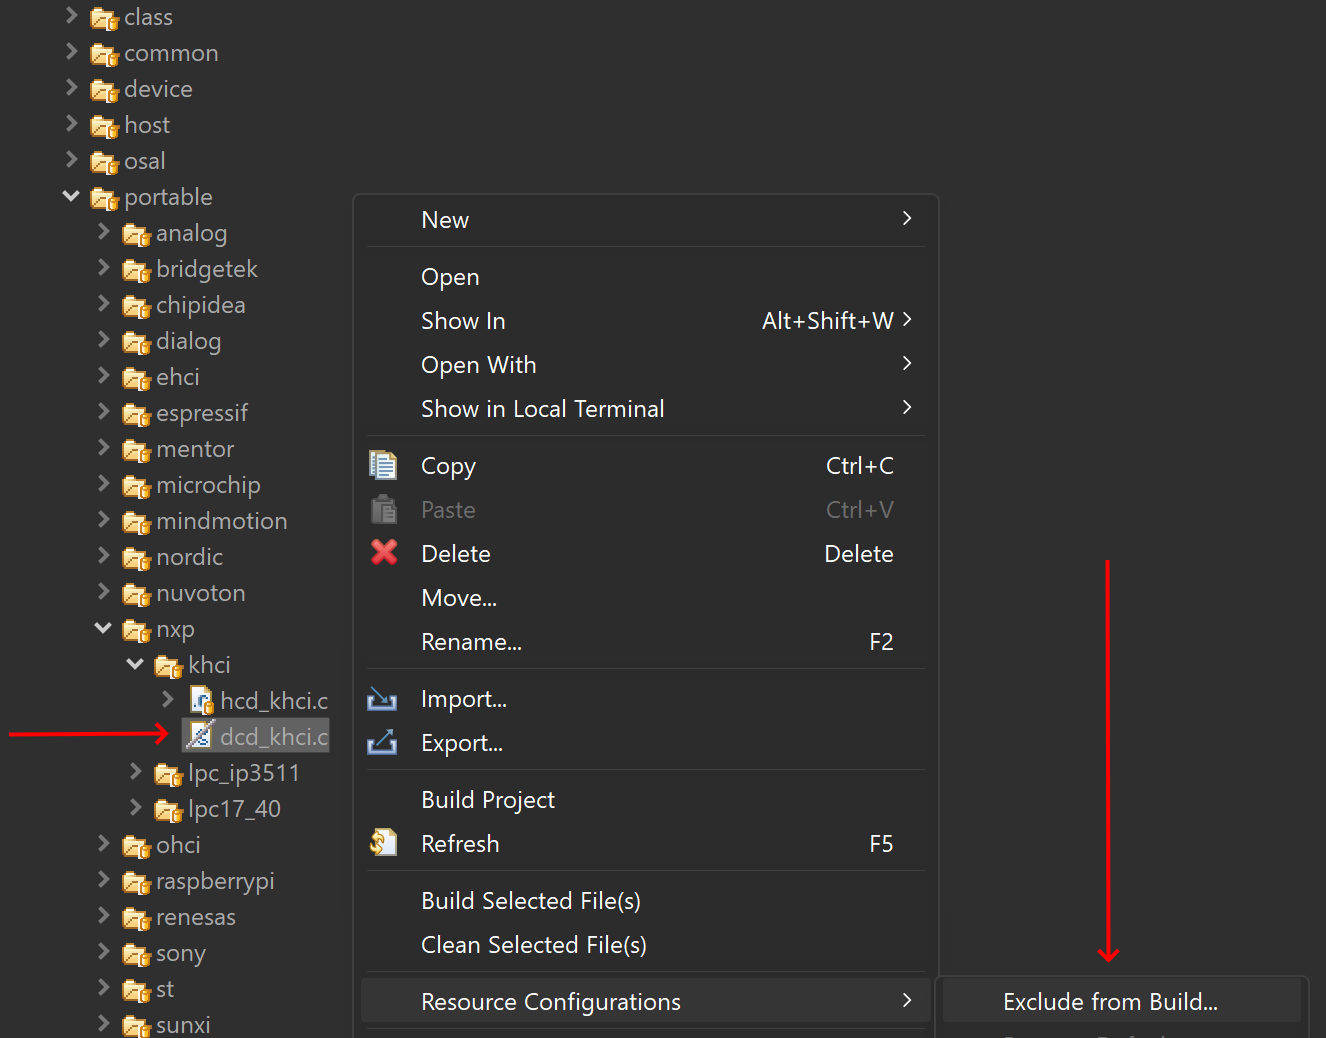
Step 6 : Exclude dcd_khci.c
Exclude tinyusb/src/portable/nxp/khci/dcd_khci.c from the project build.
Note: We must remove this because we included the entire TinyUSB source tree with all the different vendor hardware support. This step may not be required with future version of TinyUSB. This example was built around version 0.17 as specified intusb_option.h.
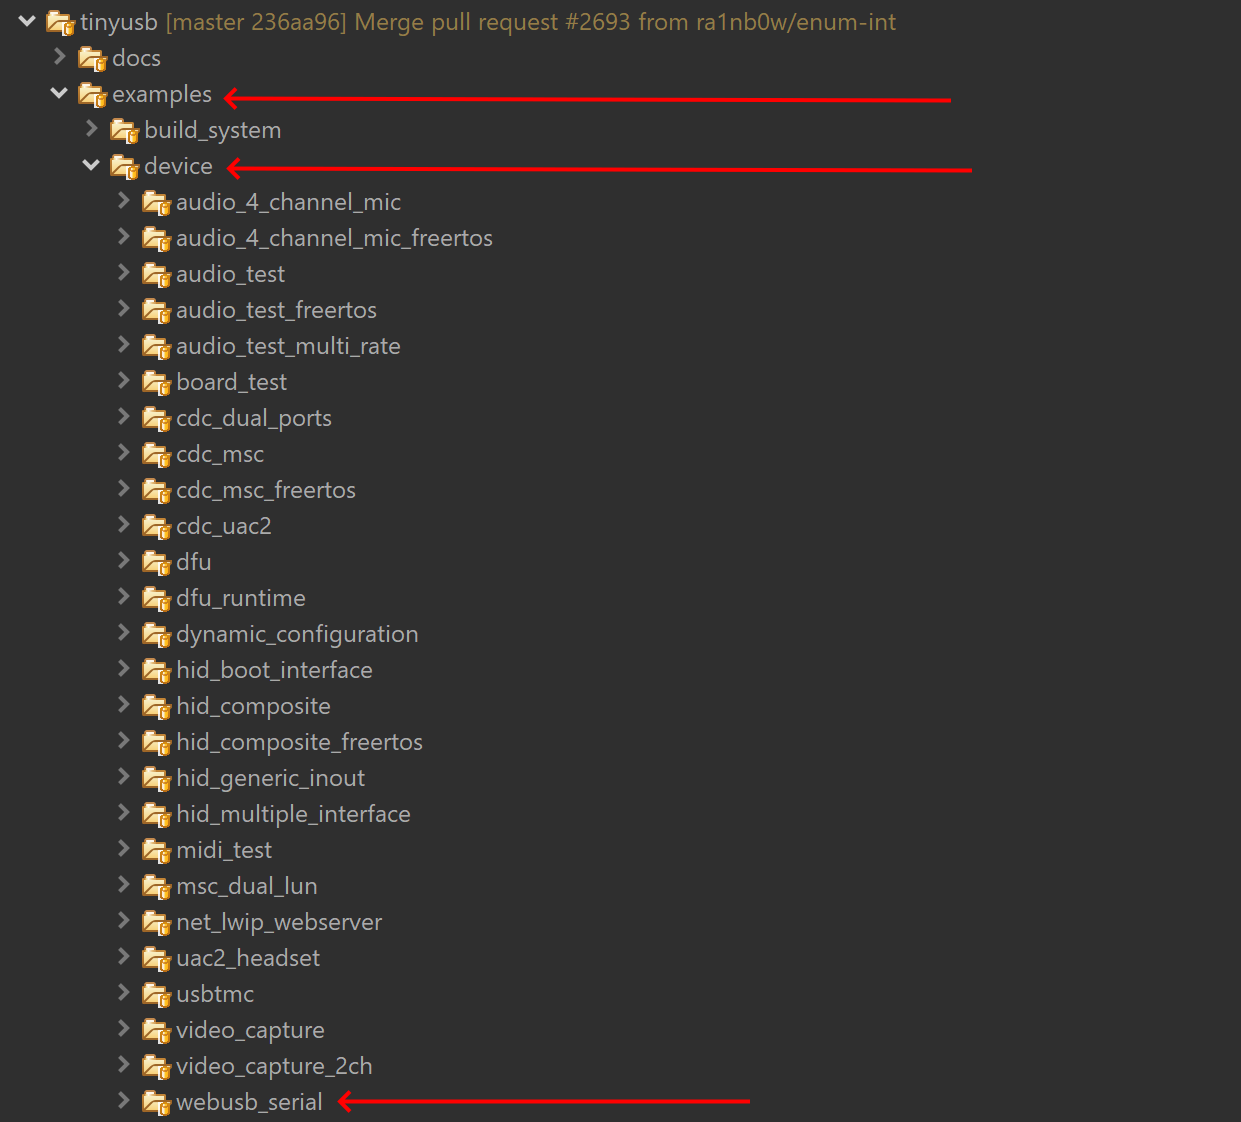
Step 7:Use a TinyUSB example to configure your application
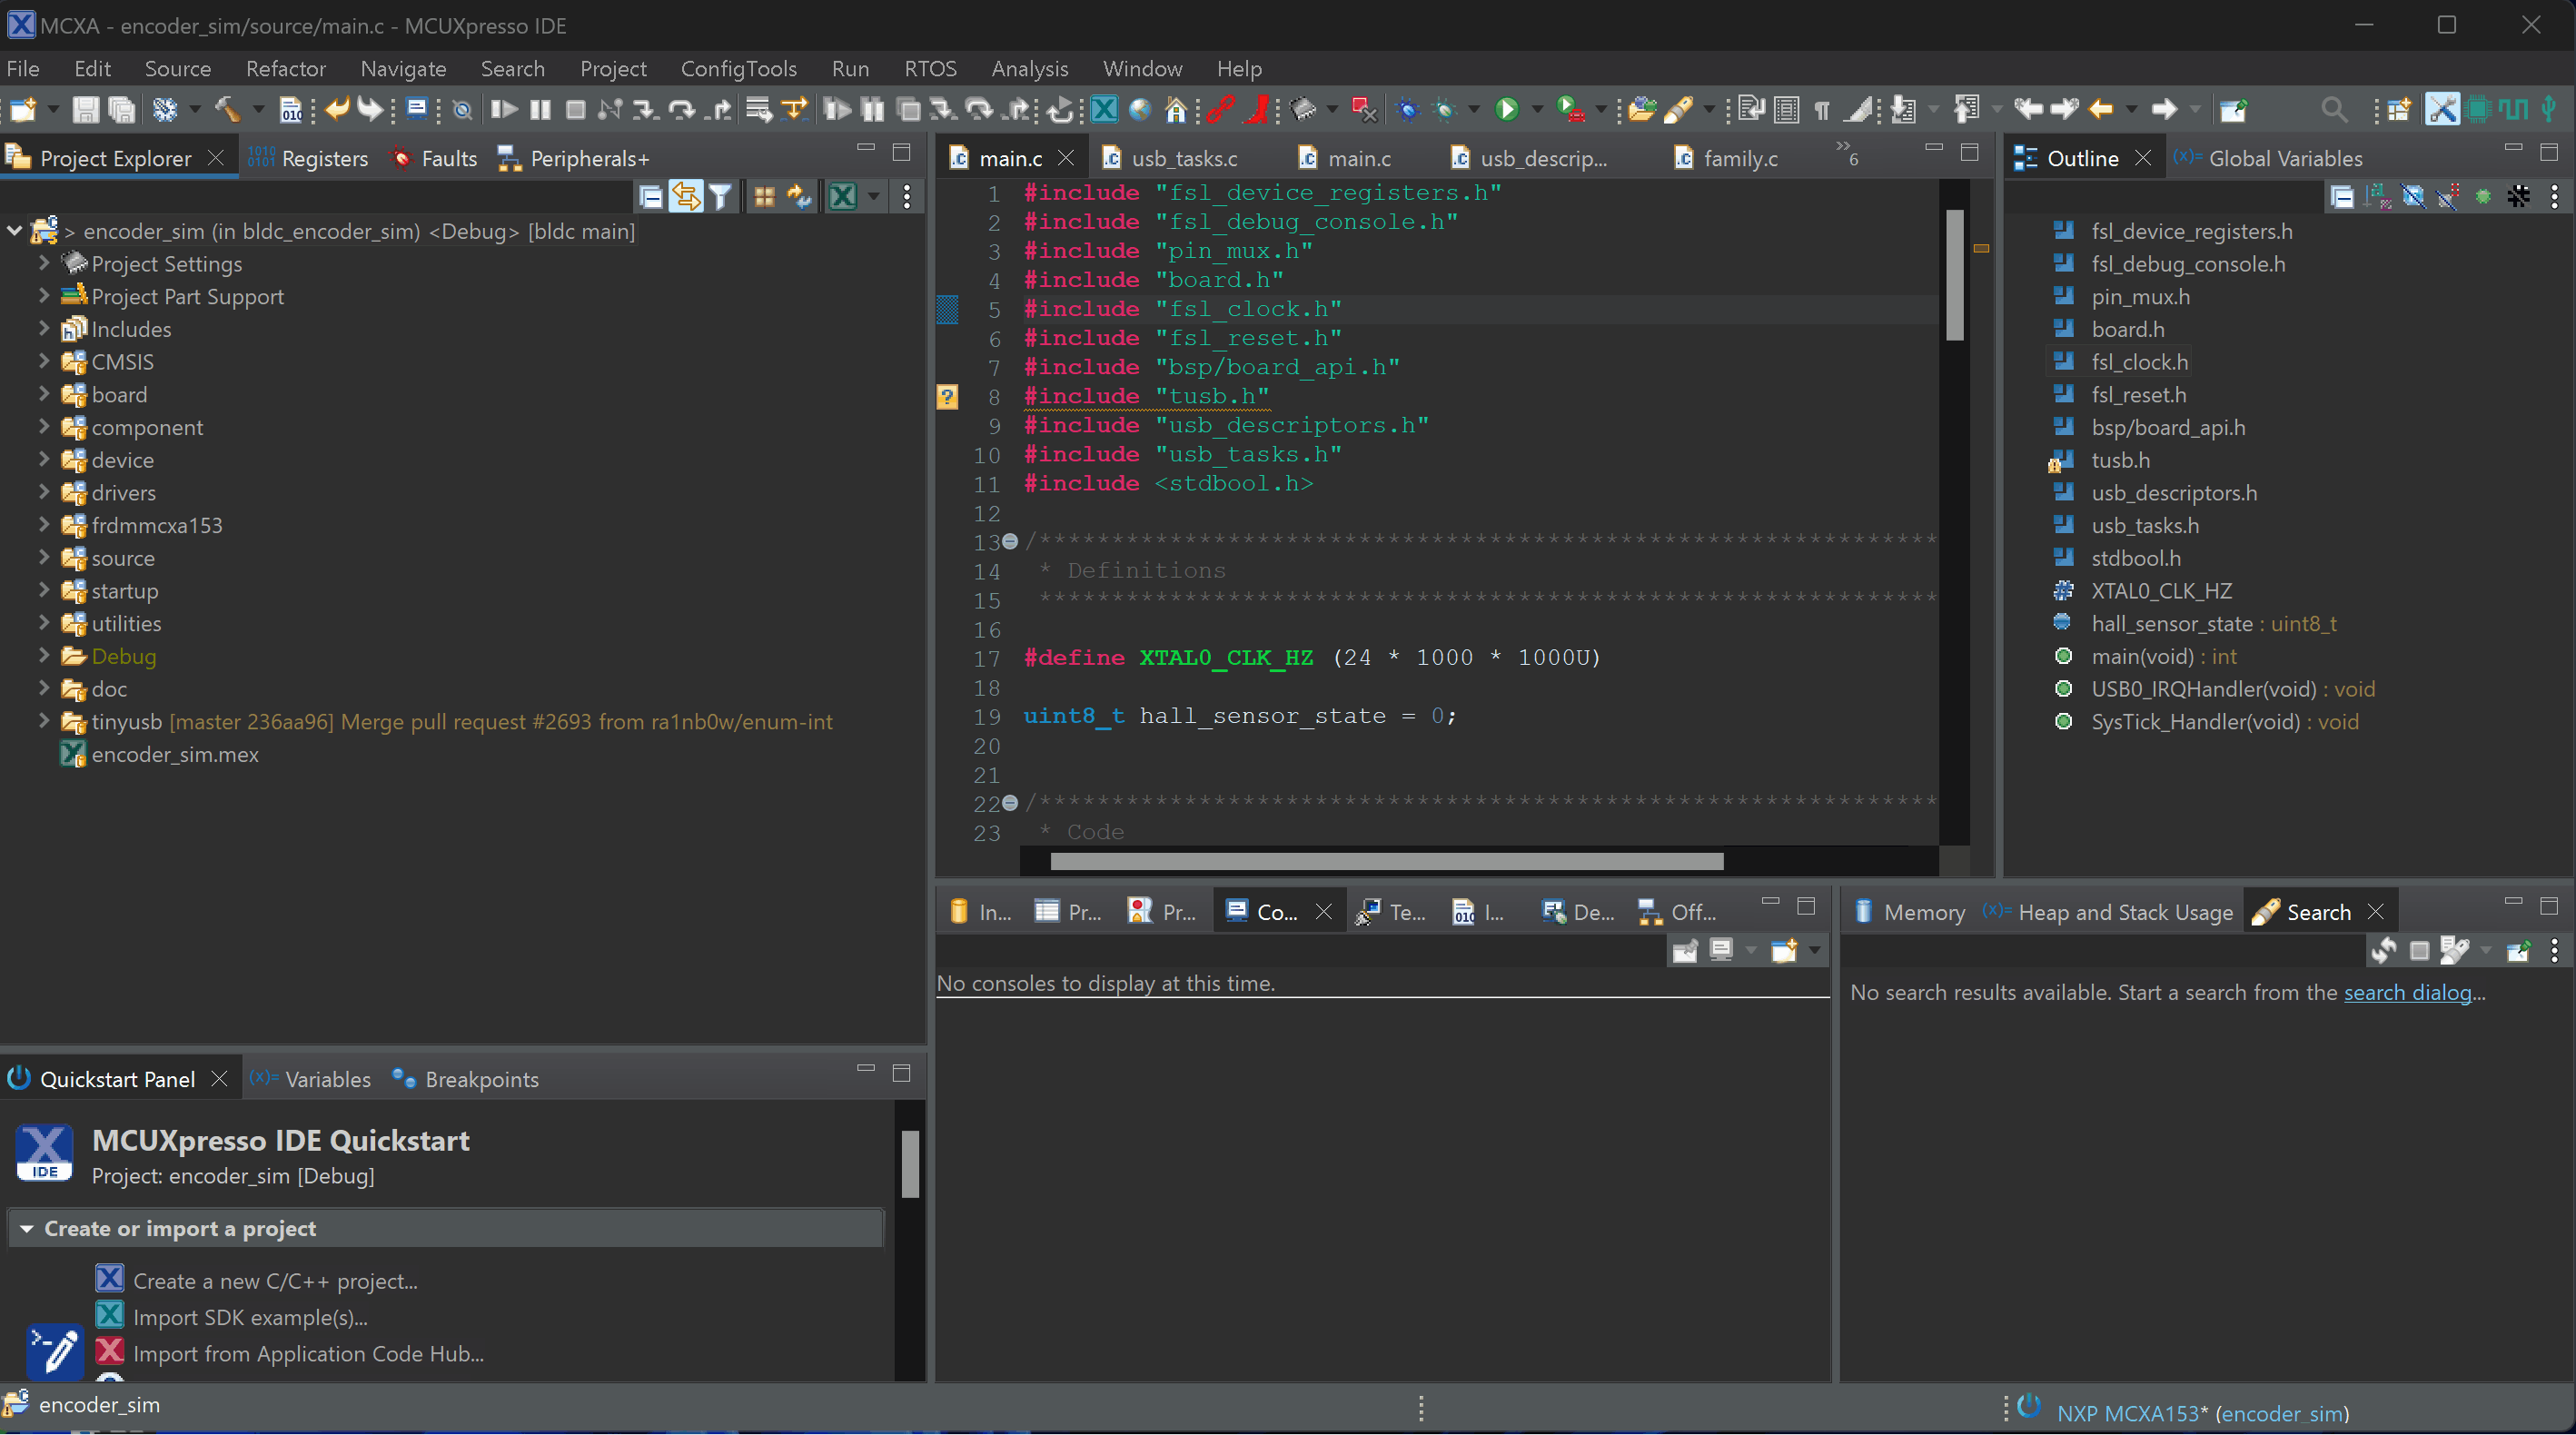
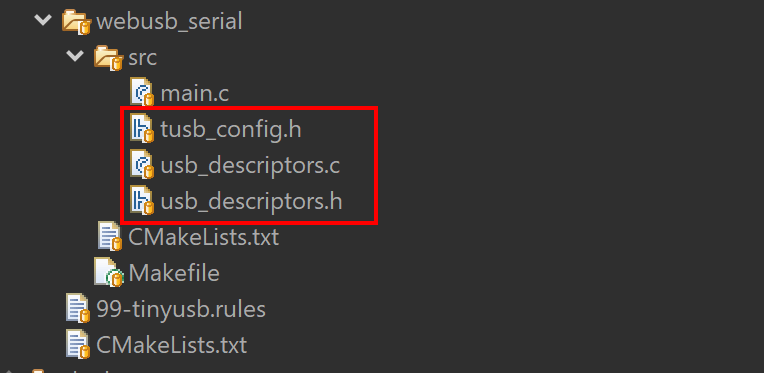
At this point, the core of TinyUSB is part of your project. From here you can use example specific files from TinyUSB/examples/device. In almost all cases, you will need the tusb_config.h, usb_descriptors.c, usb_descriptors.h in your project.
For this sample, I used the webusb_serial sample as a starting point for the USB descriptors and TinyUSB configuration.
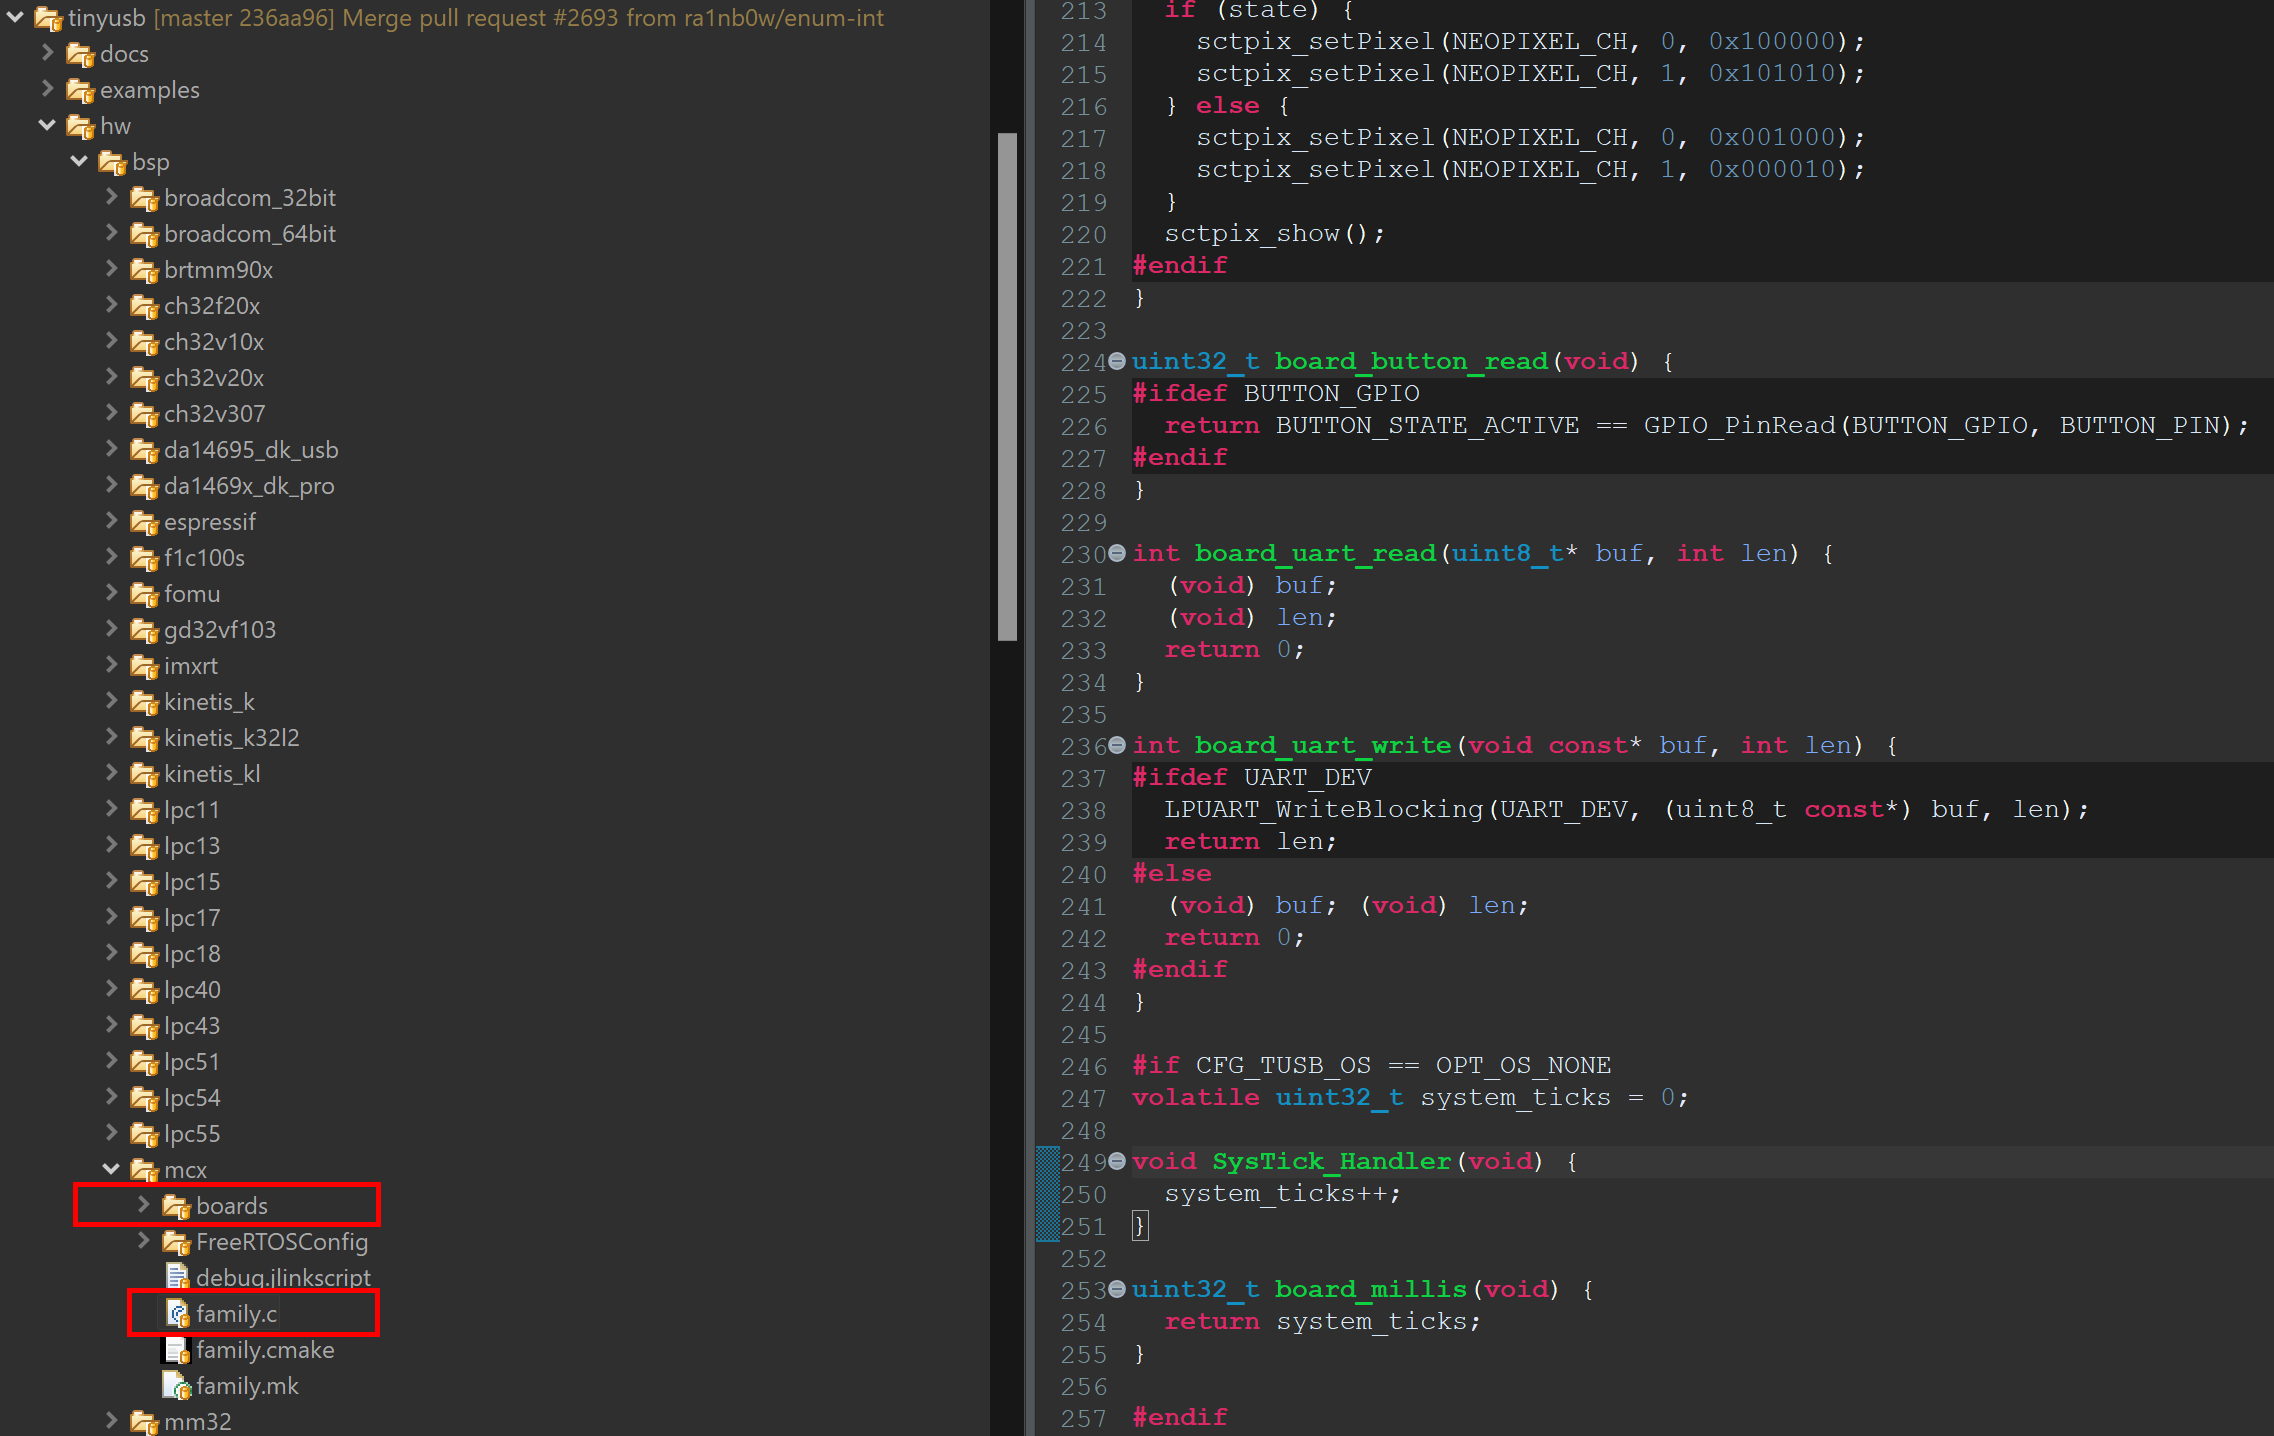
Note: As you study a TinyUSB example you will see generic calls to functions asboard_led_write() andboard millis().TinyUSB has a small board HAL for its examples when building with the command line tooling. You can port these functions or remove them as needed in your own application.
You can find the built in implementations in tinyusb/hw/bsp/mcx.Family.c has support for both MCX N and MCX A.
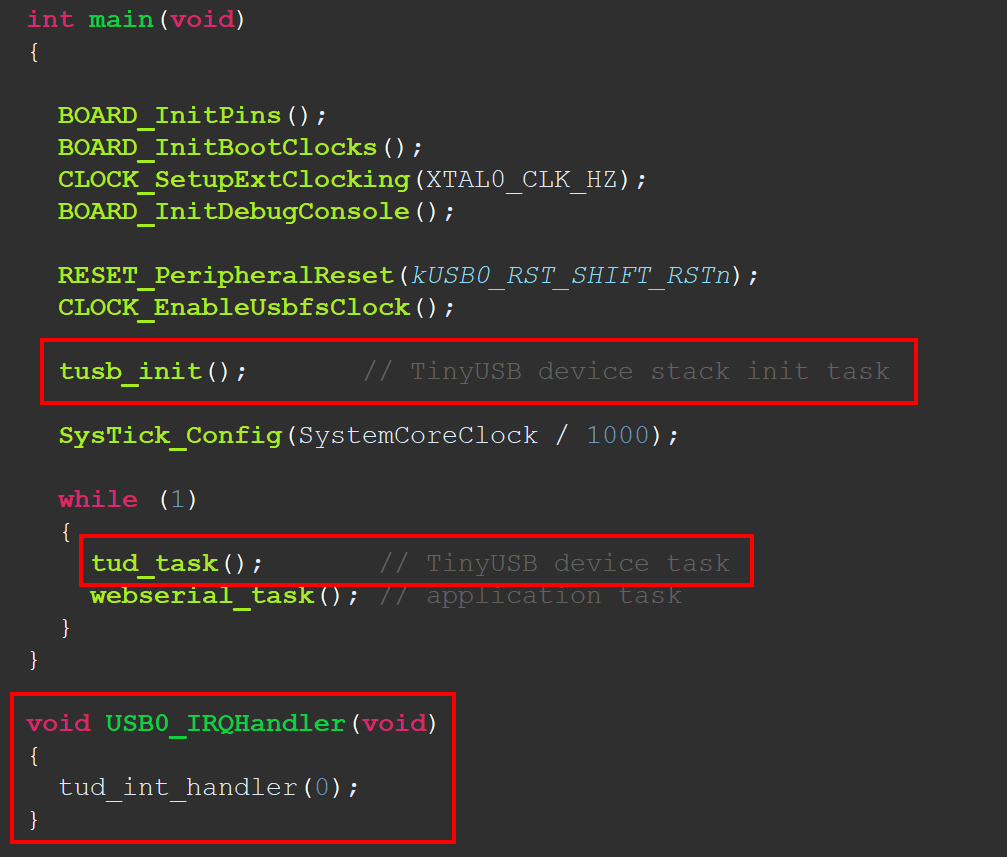
To make TinyUSB run, tusb_init() needs called at startup. For bare metal applications, tud_task(); needs called periodically to process USB activity. tud_int_handler() needs connected to the MCXA IRQ handler.
From here, you can add your application logic. The examples are good references on how to use the device classes.
Wrapping Up
The NXP MCXA153 is a useful microcontroller for small, embedded USB devices. Combined with the USB stack built into the SDK, or with the open source TinyUSB stack, it is easy to creak your own USB protocol bridges and test tools. In this paper we showed to how to integrate TinyUSB into an MCUXpresso project and demonstrated with a USB CDC / WebUSB application for a BLDC Motor controller test application.